1. Introduction
Welcome to the Arrow Escape template documentation. This package provides a comprehensive, production-ready grid-based puzzle game framework. It has been designed specifically for fast prototyping, high extensibility, and ease of use without touching a single line of code unless you want to.
This document satisfies the Unity Asset Store submission guidelines (Section 2.6.c) by providing extensive insight into how the template is structured, how to use its custom tools, and how you can edit and expand the project to create your own unique game.
.png)
.png)
2. Core Architecture
The project is built on a clean, decoupled architecture using standard Unity patterns and C# ScriptableObjects for data management. All core scripts reside in Assets/ArrowEscape/Game_Scripts/.
- GridSystem.cs: The mathematical backbone of the game. It handles a discrete 2D grid, manages the occupancy of cells, and prevents overlapping.
- LevelManager.cs: The main orchestrator during gameplay. It loads the
LevelData, instantiates the arrows, handles the move limits, and determines win/loss conditions. - ArrowUnit.cs: Controls individual arrow behavior, including movement logic, collision detection via the grid system, and visual sliding animations.
- ScriptableObject Data: Levels are saved as
LevelData.csScriptableObjects, containing grid dimensions, max moves, and arrow definitions (positions and colors). This ensures zero scene clutter and easy memory management.
3. Level Editor Guide
We've built a custom visual Level Editor to completely bypass manual coordinate entry. This is the fastest way to design puzzles.
Opening the Editor
Navigate to the top menu bar in Unity: Window > Arrow Puzzle Level Editor.
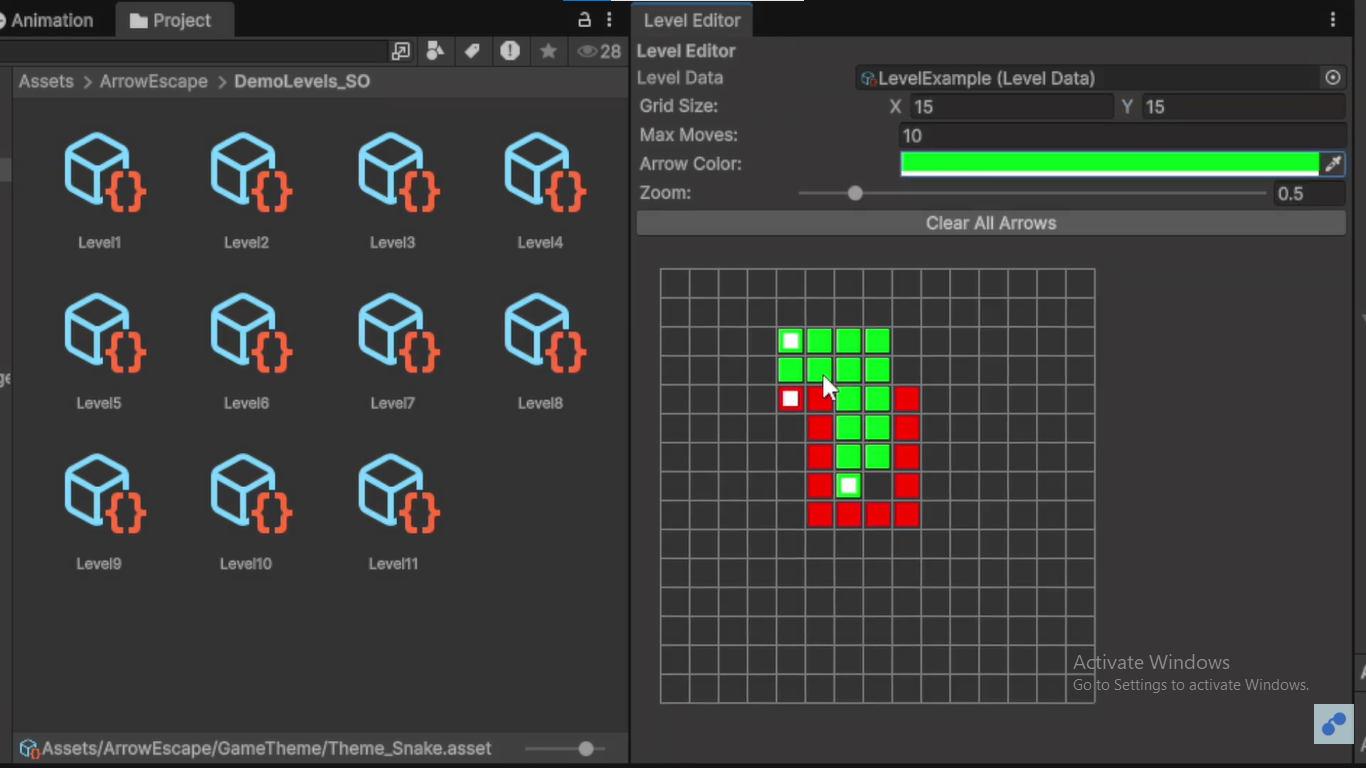
How to Use It
- Assign Level Data: Drag and drop a
LevelDataasset into the slot, or click "Create New Level Data". - Grid Size: Adjust the X and Y dimensions of your puzzle grid.
- Painting Arrows:
- Select a color from the Arrow Color picker.
- Left Click and Drag on the grid to draw the arrow's body. The first cell you click becomes the Head (indicated by a triangle).
- Right Click on any arrow to delete it.
- Max Moves (Auto): The system automatically calculates a baseline for maximum moves, but you can override this directly in the
LevelDatainspector. - Save: The editor automatically saves changes to the ScriptableObject when you finish drawing an arrow.
Pro Tip
You can zoom in and out of the grid by holding Ctrl + Scroll Wheel inside the editor window!
4. Themes & Customization
The visual style of Arrow Escape can be overhauled in seconds using the ThemeManager.
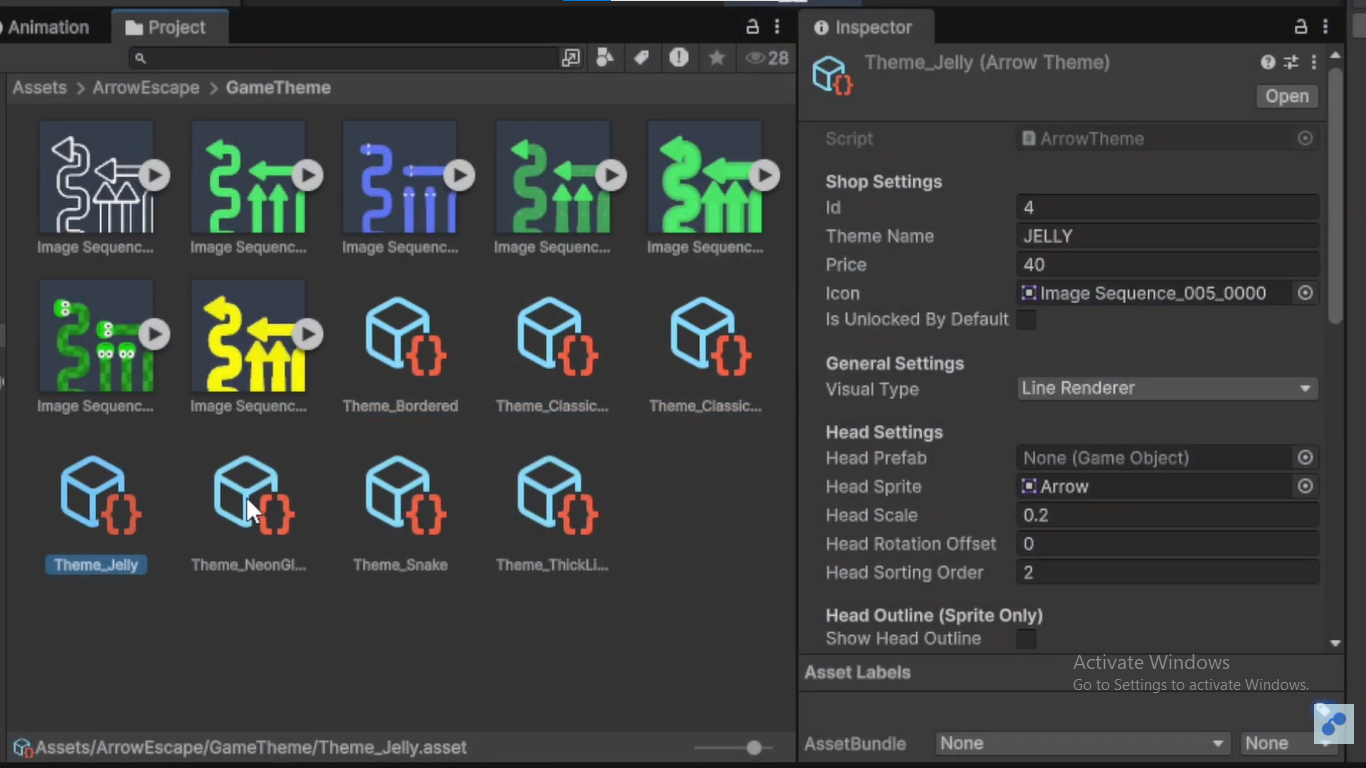
Navigate to Assets/ArrowEscape/GameTheme to find pre-made themes, or create your own by right-clicking in the Project window: Create > ArrowPuzzle > Theme.
- Backgrounds: Assign static colors or assign a dynamic material.
- Arrow Styling: Swap out the default sprites or materials for the arrows.
- Grid Visuals: The
GridVisualizer.cswill automatically adapt to the colors specified in the active theme.
5. Monetization & Ads
The template comes fully integrated with AdMob (or a mock ad system for testing). Managed by AdsManager.cs.
Configuration
Select the AdsManager GameObject in your initial scene. You can toggle ads on/off via the enableAds boolean. If enabled, the game will present Rewarded Video ads when the player tries to use Hints or Skip a level.
To integrate real AdMob, simply import the Google Mobile Ads SDK and place your App IDs in the standard Unity Ads settings.
6. Coin & Purchase System
We've included a comprehensive virtual currency system to reward players and allow powerup purchases if ads are disabled.
How it Works
- CurrencyManager.cs: Persists coin balances across sessions using PlayerPrefs.
- Earning: Players earn 50 coins (customizable) upon successfully completing a level.
CoinFeedbackManager.cshandles the UI particle fly-animation. - Spending: Managed via the Purchase Dialog. If
AdsManager.enableAdsis false, the UI prompts the player to spend coins (e.g., 100 for a Hint, 200 for a Skip).
For detailed UI setup for the purchase dialog, refer to the included PURCHASE_DIALOG_SETUP.md file inside the project directory.
7. Extending the Game
The architecture is designed to be highly modular. Here is how you can expand on the template:
Adding New Block Types (e.g., Obstacles, Teleporters)
- Create a new C# class that inherits from
MonoBehaviour. - In
LevelData.cs, add a new list for your custom obstacle positions. - Modify
LevelManager.csto read these positions and instantiate your prefabs. - Update
GridSystem.csto register these cells as "Occupied" but tag them as non-movable.
Custom UI Elements
The UIManager.cs uses Unity's event system. You can easily add new panels (like a Daily Rewards screen) and trigger them via public methods in UIManager or CurrencyManager without disrupting the core game loop.
8. API Reference
Key public methods you can call from your own custom scripts:
// GridSystem.cs
public bool IsCellOccupied(Vector2Int pos);
public ArrowUnit GetArrowAt(Vector2Int pos);

// LevelManager.cs
public void UseHint();
public void SkipLevel();
public void RestartLevel();

// CurrencyManager.cs
public void AddCoins(int amount);
public bool SpendCoins(int amount);
public int GetCurrentCoins();
Arrow Escape Template Documentation © 2026